License Revocation
Overview
License revocation is the process of revoking a currently activated license.
Once revocation is complete, one license becomes available for use, which can then be activated on another computer if needed.
Revocation Steps
- Request Revoke from Web Portal - Select the license to revoke from the activated licenses list and download the Permission Ticket
- Generate Revocation Ticket - Create revocation ticket using HancomLicenseManager.exe
- Complete Revocation - Upload Revocation Ticket to finalize revocation
When you revoke a license, one license becomes available for use. The recovered license can be reactivated on the same computer or a different computer.
Revocation Process
Prerequisites
The license program is required for license revocation.
Check License Program
Use the program downloaded during activation.
If you don't have it, download it again from the link below:
- Windows: HancomLicenseManager.zip
- macOS: Coming soon
- Linux: Coming soon
Extract and Verify Files
HancomLicense/
├── HancomLicenseManager.exe        # License management program
└── ProductConfig.xml               # Configuration file
Run HancomLicenseManager.exe
Select the [Revoke] tab
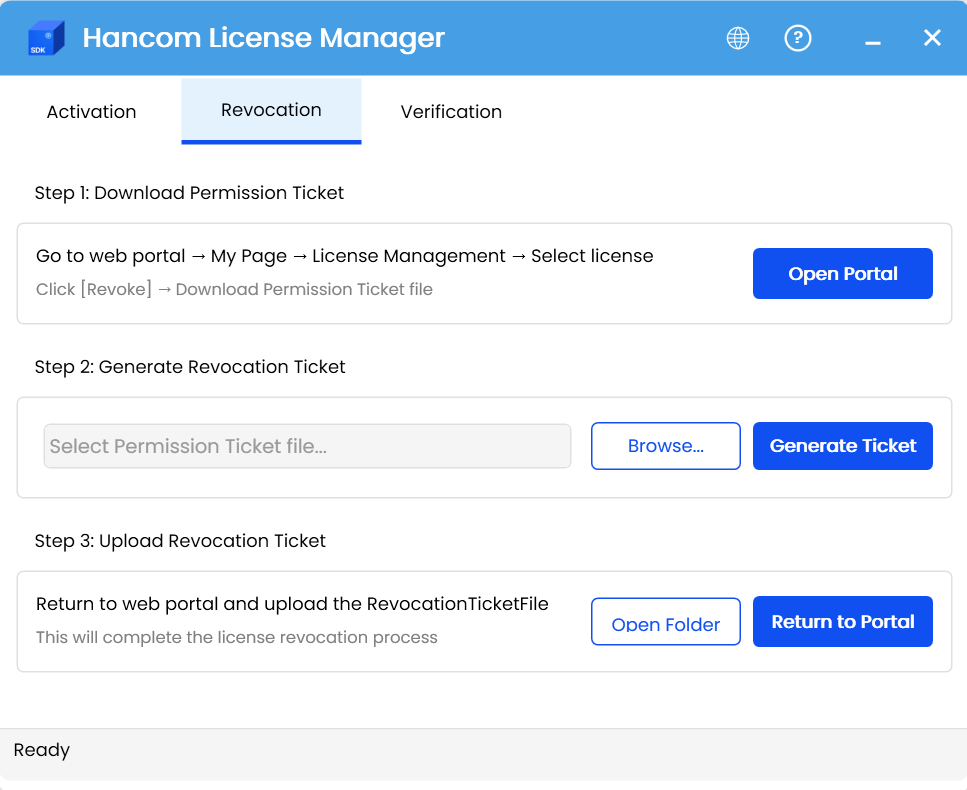
1. Request Revoke from Web Portal
1.1 Access Web Portal
- Click the [Open Portal] button in step 1 to access the SDK sales site
- Log in to your account
- Navigate to My Page → License Management
1.2 Start Revoke
- Check the activated licenses list
- Select the item to revoke (identified by username and LockingCode)
- After verifying the selected item, click the [Revoke] button

Select the item to revoke from the activated licenses list
- Verify the revocation target in the License Revocation window
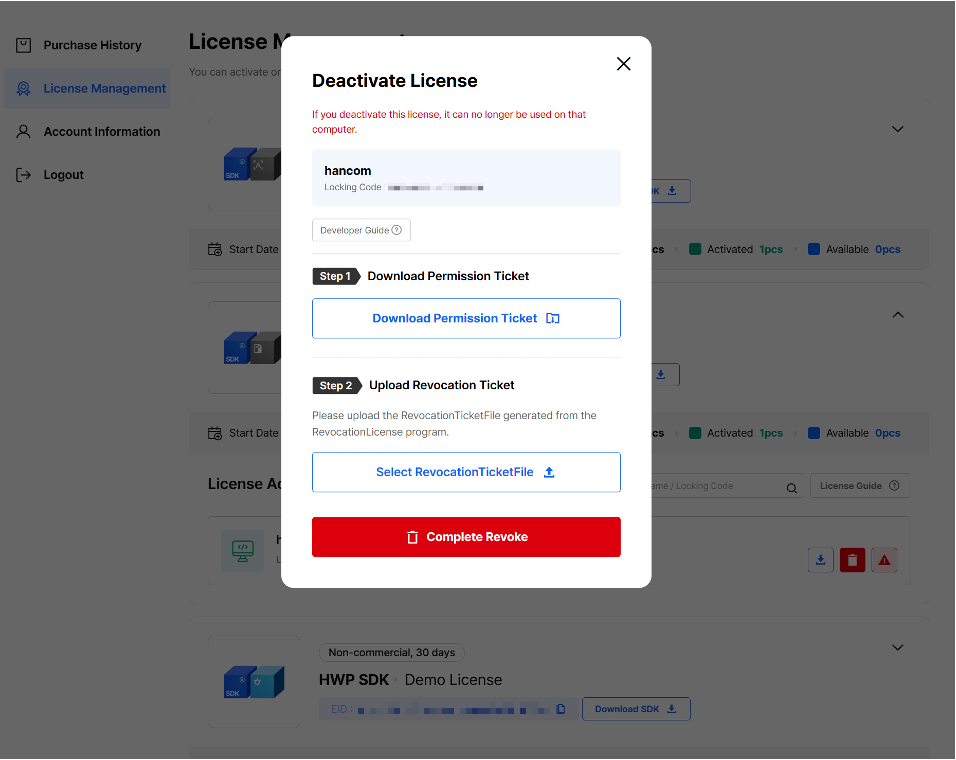
Review the detailed information of the selected license and proceed with Revoke
1.3 Download Permission Ticket
- In step 1, click the [Download Permission Ticket] button to download the Permission Ticket
- Save the
permissionTicketfile
2. Generate Revocation Ticket
- Proceed to step 2 in the Revoke tab of the
HancomLicenseManager.exeprogram - Click the [Browse] button to load the downloaded Permission Ticket file
- Click the [Generate Ticket] button
- Save the Revocation Ticket file
- Confirm the message 'Revocation Ticket generated'
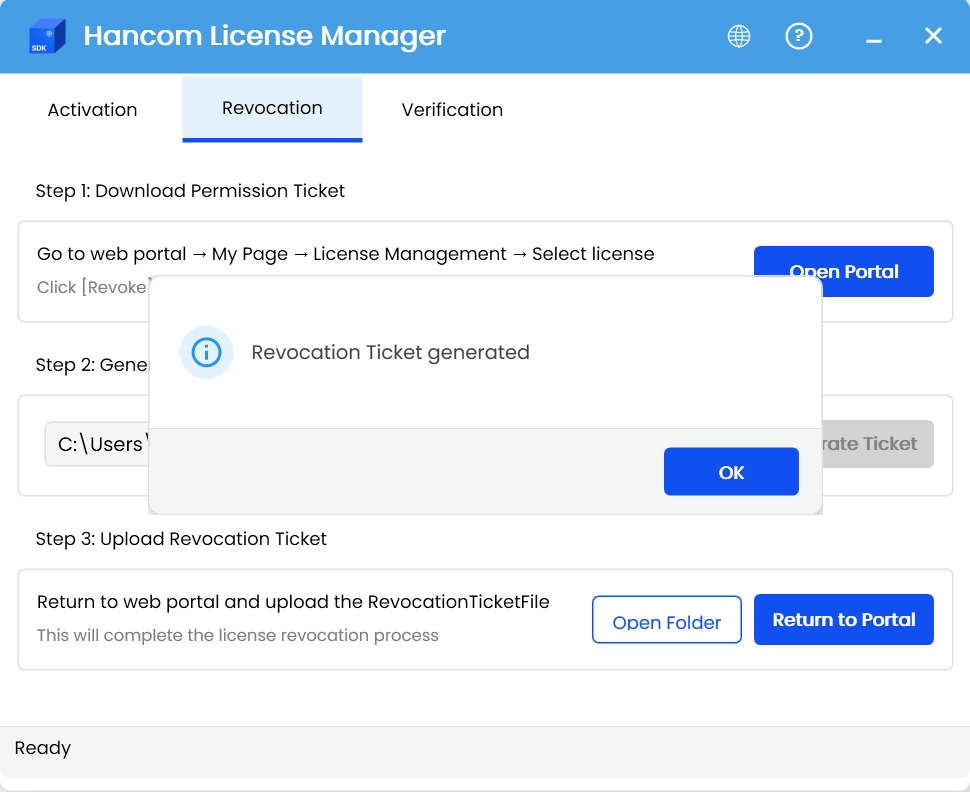
Click the Generate Ticket button in the Revoke tab
3. Complete Revocation
3.1 Return to Web Portal
- Click the [Return to Portal] button in step 3
- Proceed to step 2 Upload Revocation Ticket
3.2 Upload Revocation Ticket
- Click the [Select RevocationTicketFile] button
- Select the generated
RevocationTicketFile - Click the [Open] button
- Click the [Complete Revoke] button
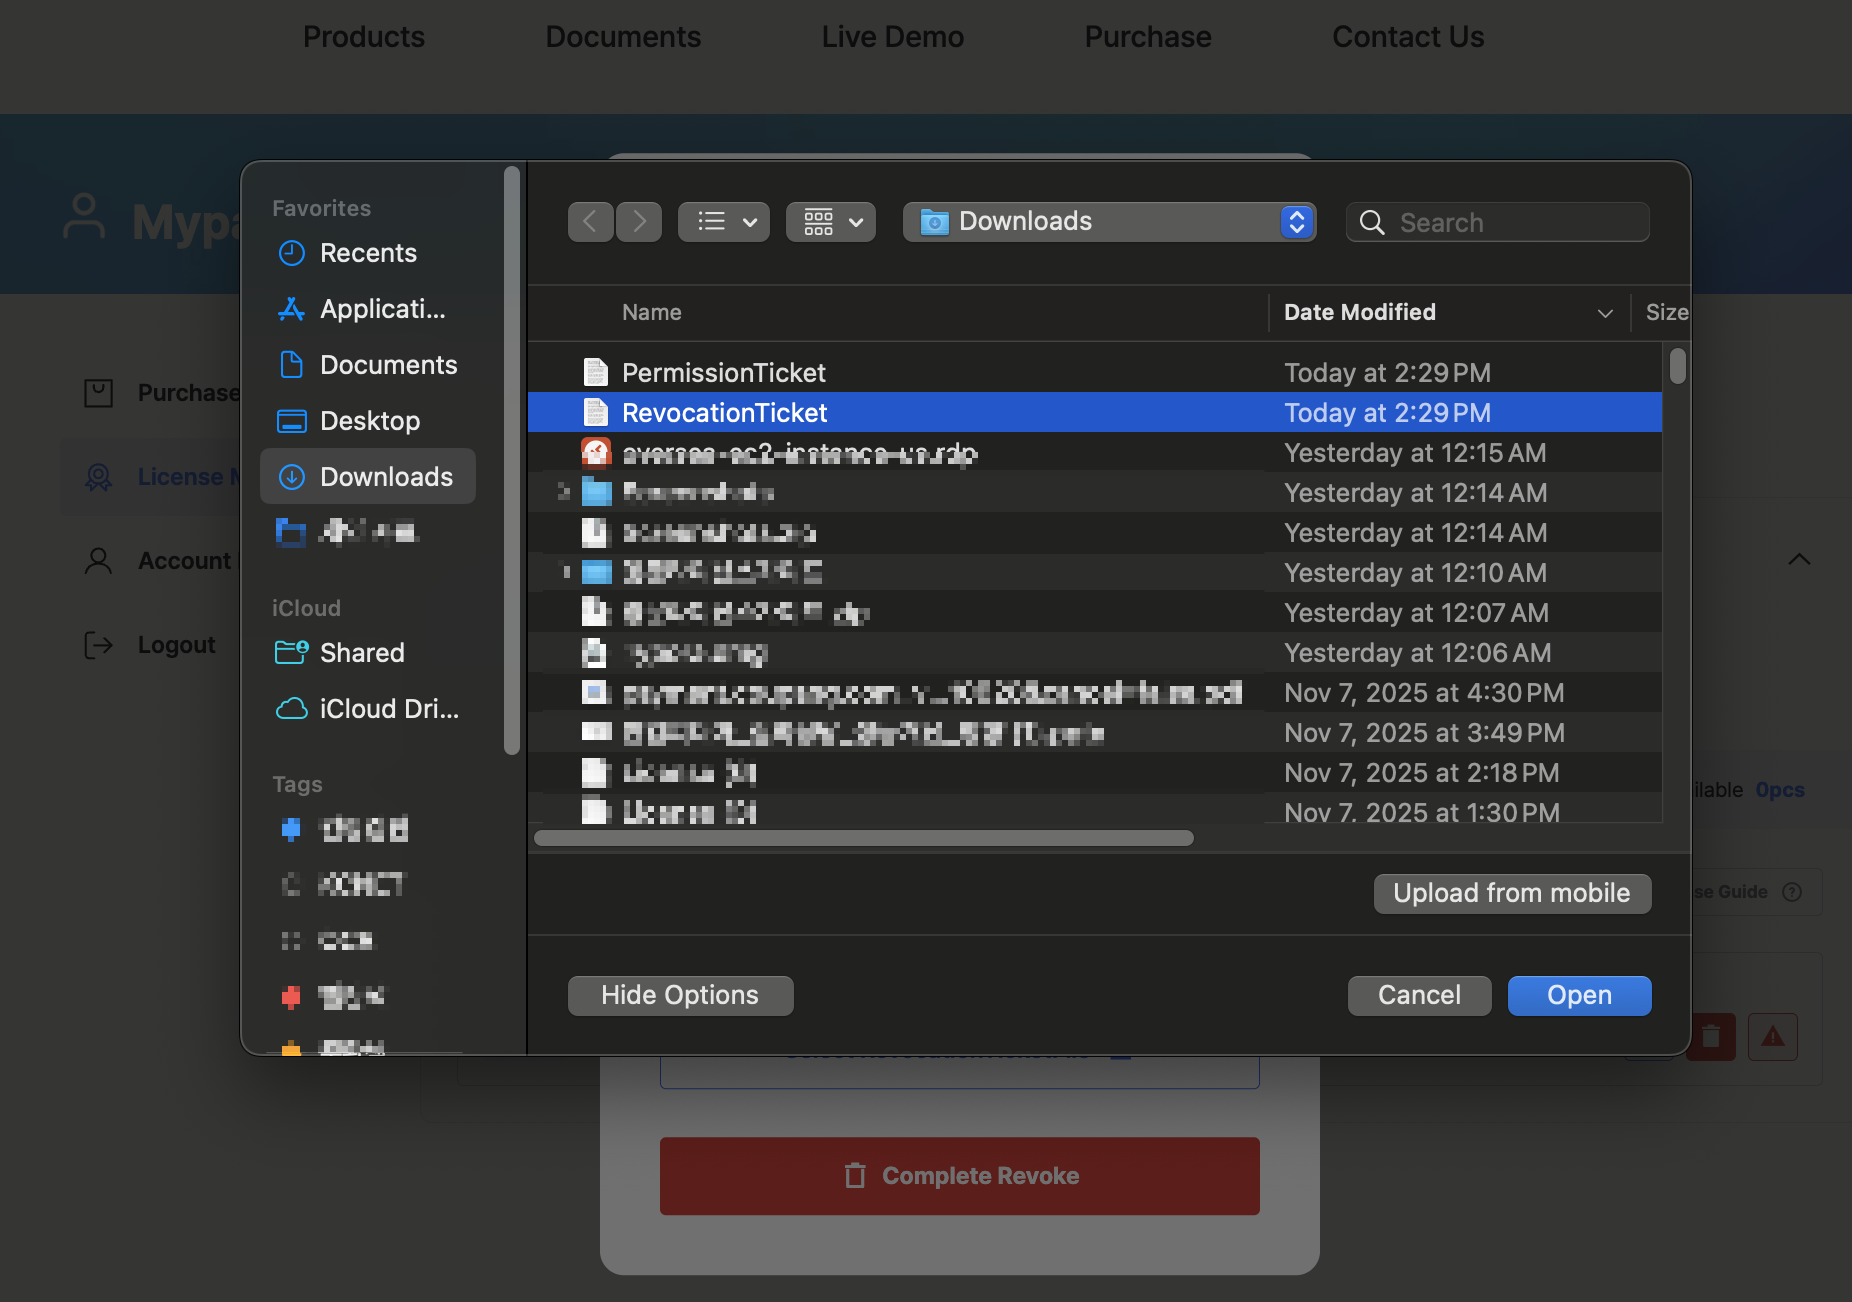
Upload RevocationTicketFile in step 2 Revocation Ticket upload

3.3 Verify Revocation
- Verify the "License has been successfully revoked." message
- Click the [OK] button
- Check if the number of Activated licenses has decreased in the license list
Local Cleanup After Revocation
Once license revocation is complete, you should remove the license file from the local system.
# Remove license file
rm C:\HancomSDK\license
Force Revocation
If you cannot access the computer (due to malfunction, loss, etc.), you can request force revocation.
Request Force Revocation
- Select the [Force Revoke] menu from the web portal
- Write the reason for revocation (provide detailed information)
- Review (1-2 business days)
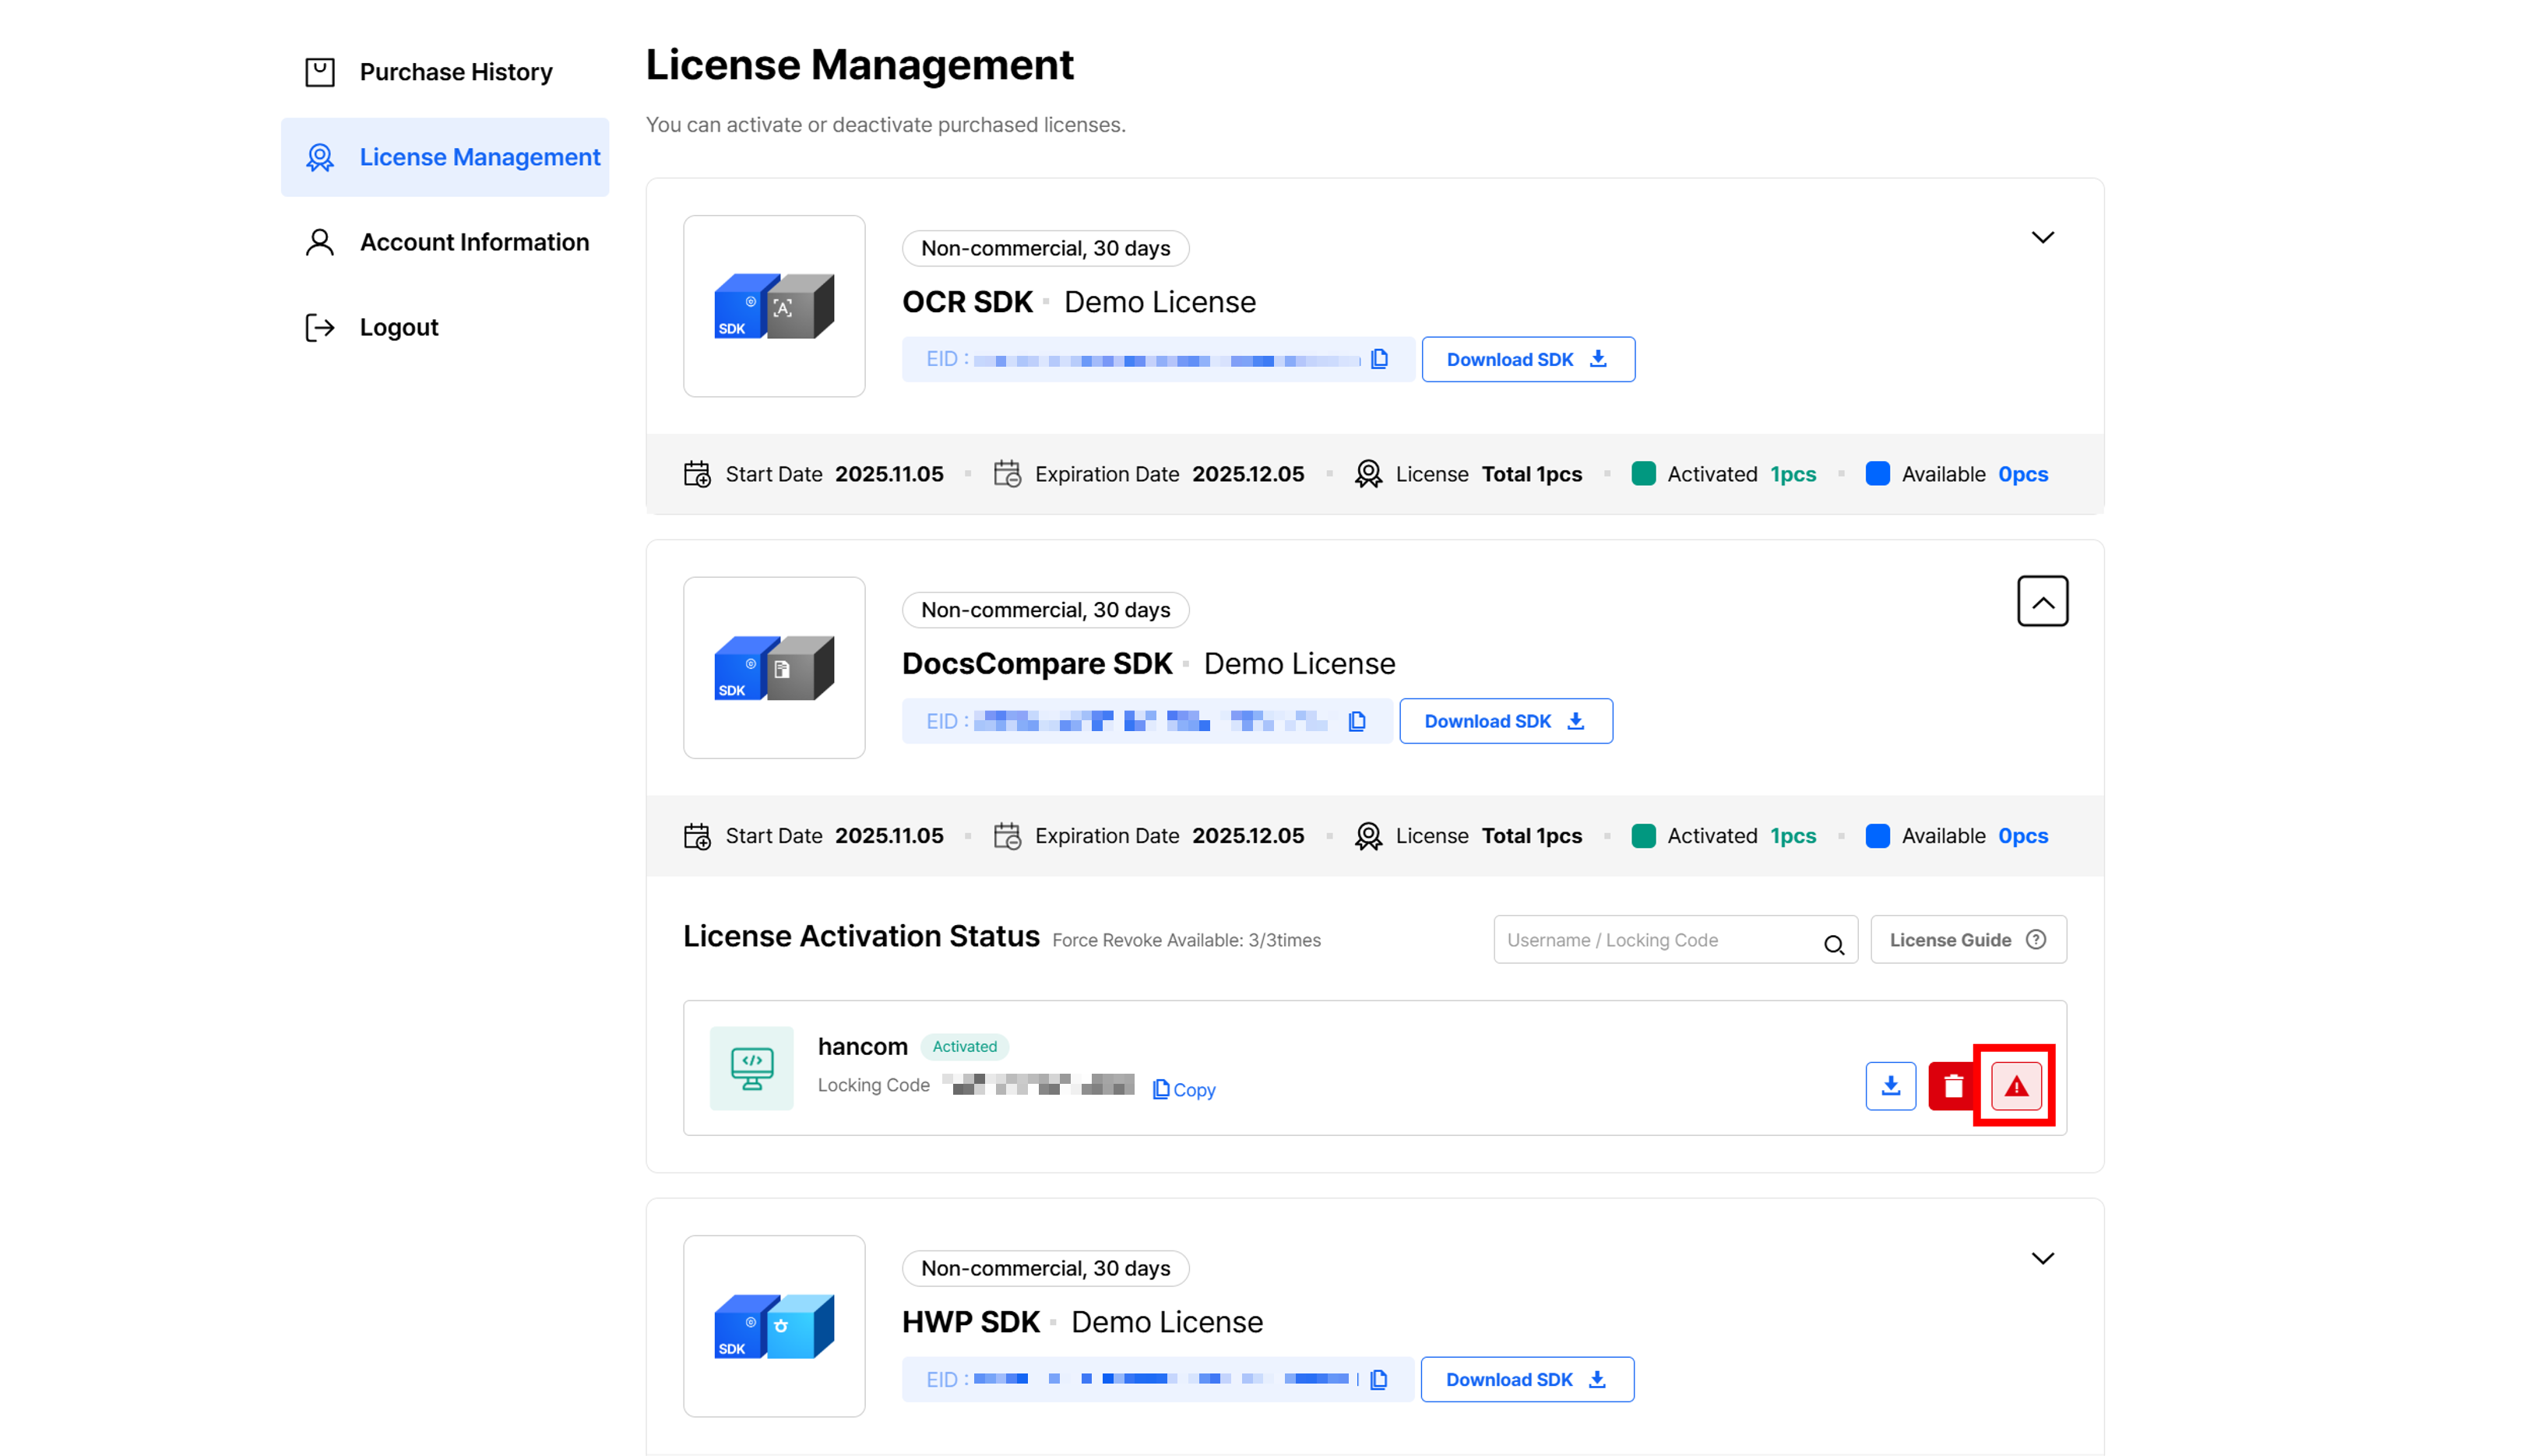
Force revocation is limited to a total of 3 times. Please contact us for more details.
After Revocation Complete
Once license revocation is complete:
- ✅ One available license is secured
- ✅ The Activated count decreases on the web portal
- ✅ Can be reactivated on any computer when needed
All license revocation processes support offline environments. Permission Ticket and RevocationTicketFile can be transferred via USB or other means for processing.