License Activation
Overview
License activation is the process of registering your purchased license to make it available in your actual development environment.
All licenses support offline environments. They work normally without an internet connection and do not require periodic online authentication.
4-Step License Activation Process for SDK Products
- Initial Setup (Init) - Initialize the license program on first run
- Generate Locking Code - Generate hardware-specific code using the Generate button
- License Activation - Activate license and download file using the generated code
- License Installation - Install the downloaded license file to your system
Initial setup (Init) is only required when using the license program for the first time. For subsequent license activations, start from step 2.
Detailed Activation Process
Prerequisites
Download and use the following program for activation/deactivation.
Download License Program
- Windows: HancomLicenseManager.zip
- macOS: Coming soon
- Linux: Coming soon
Extract and Verify Files
After extracting the downloaded HancomLicenseManager.zip file, you will find the following files:
HancomLicense/
├── HancomLicenseManager.exe        # License management program
└── ProductConfig.xml               # Configuration file
1. Initial Setup (Init)
Perform the initial setup only when running the license program for the first time.
-
Run the
HancomLicenseManager.exeprogram
-
Click the [Activation] tab menu (default)
-
Click the [Initialize] button in step 1
-
Verify the "License initialization successful" message
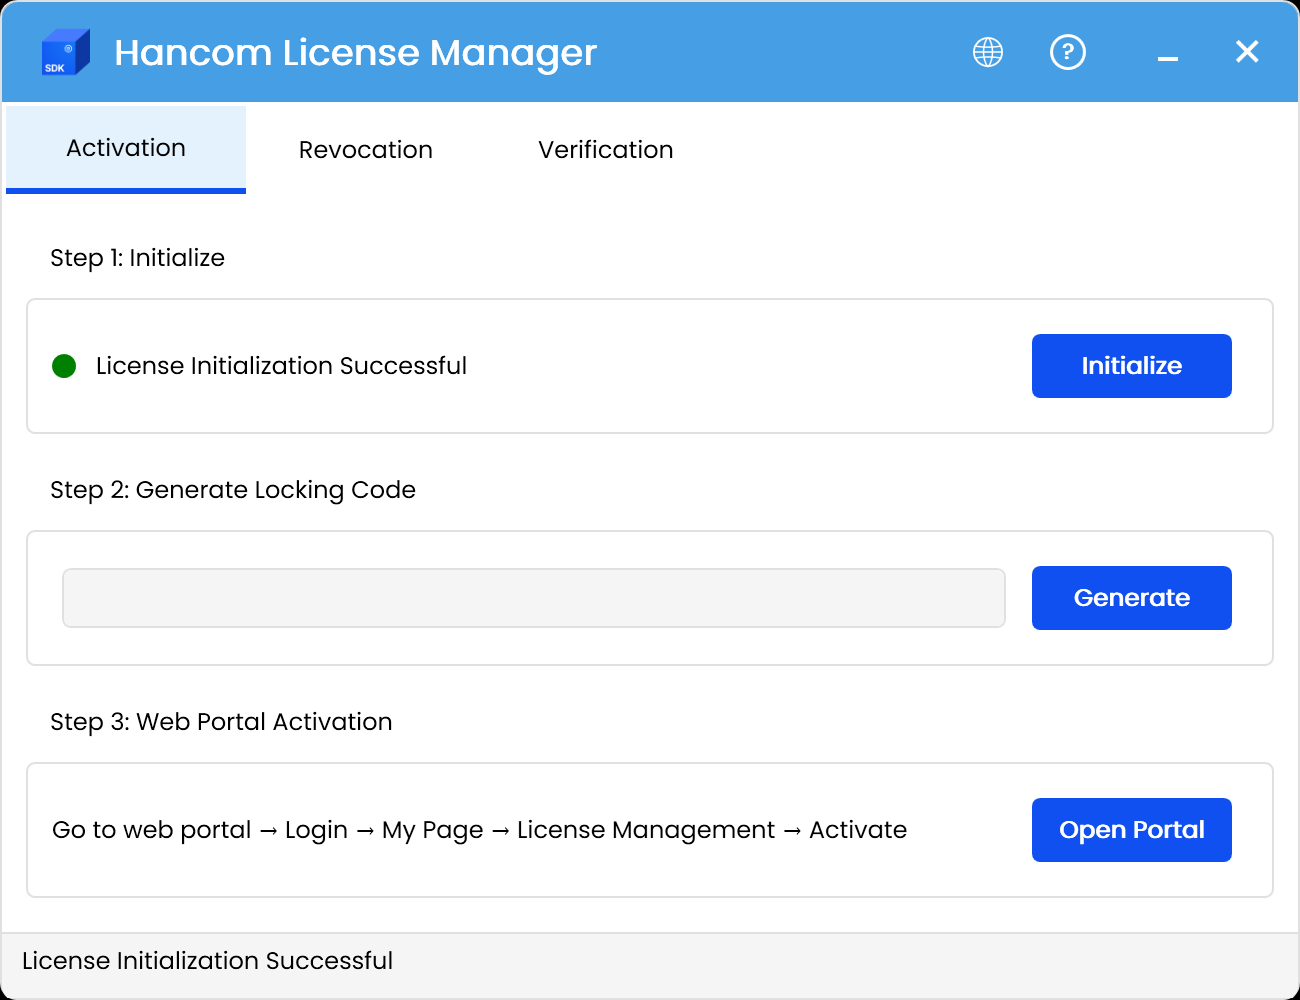
HancomLicenseManager.exe execution screen - Click the Initialize button for initial setup
Initial setup is only needed once. When the "License initialization successful" message appears, the initial setup is complete.
2. Generate Locking Code
After completing the initial setup, generate a Locking Code.
- In the same program, click the [Generate] button in step 2
- After verifying the generated Locking Code, click the [Copy] button
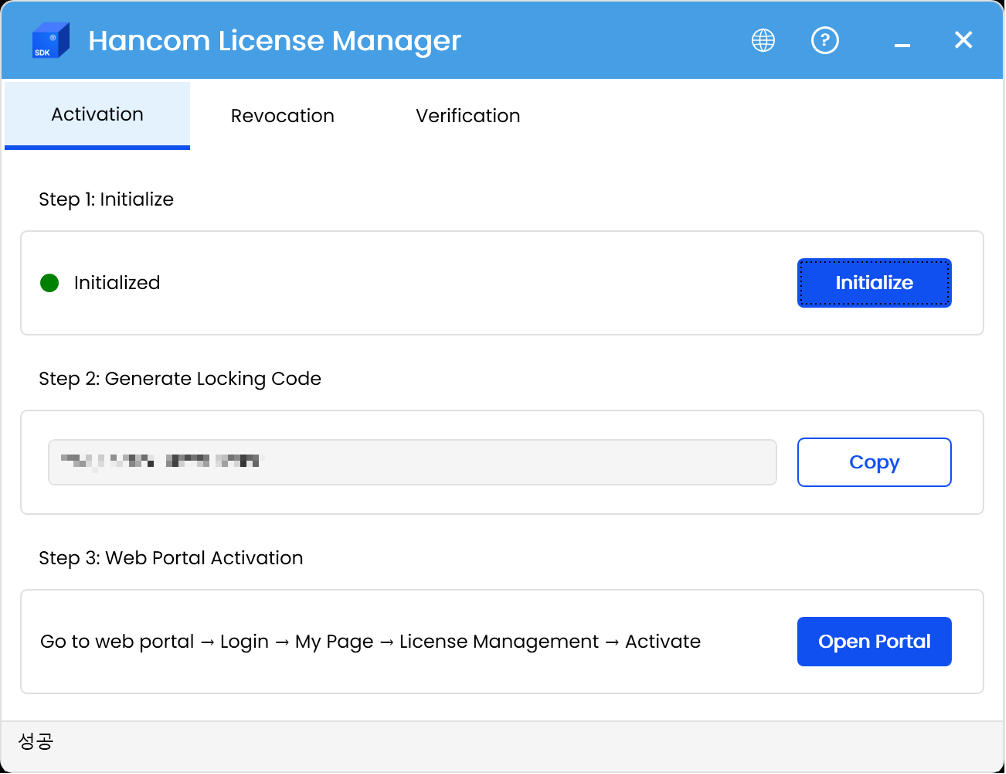
Click the Generate button to create a Locking Code and copy it
3. License Activation
Use the generated Locking Code to activate your license on the web portal.
3.1 Access Web Portal
- Click the Open Portal button in step 3 to access the SDK sales site
- Log in with the account used for purchase
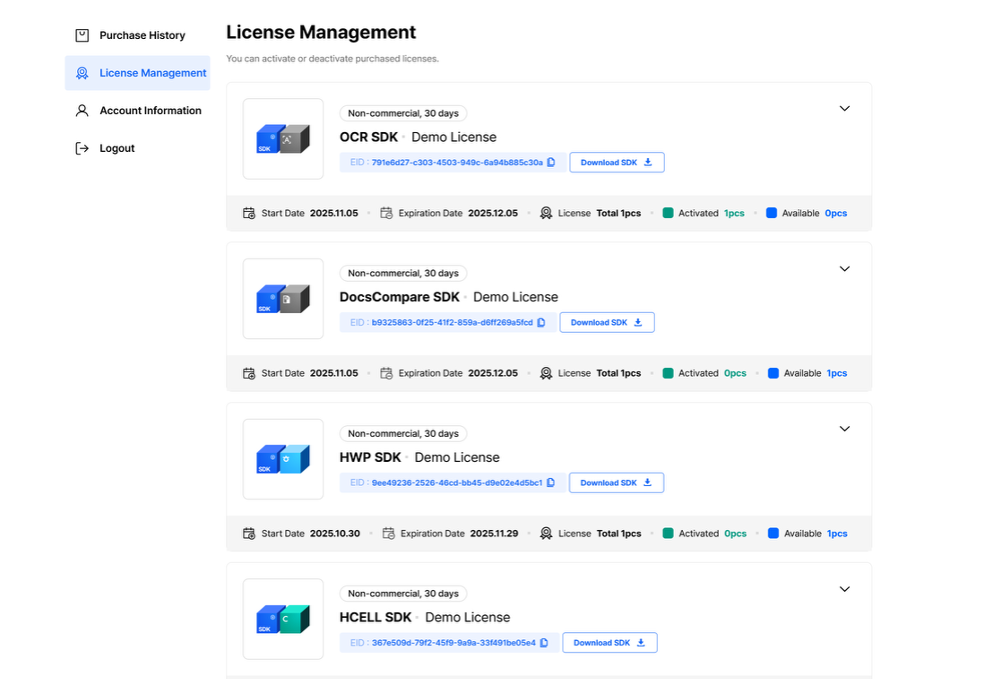
3.2 Activate License
-
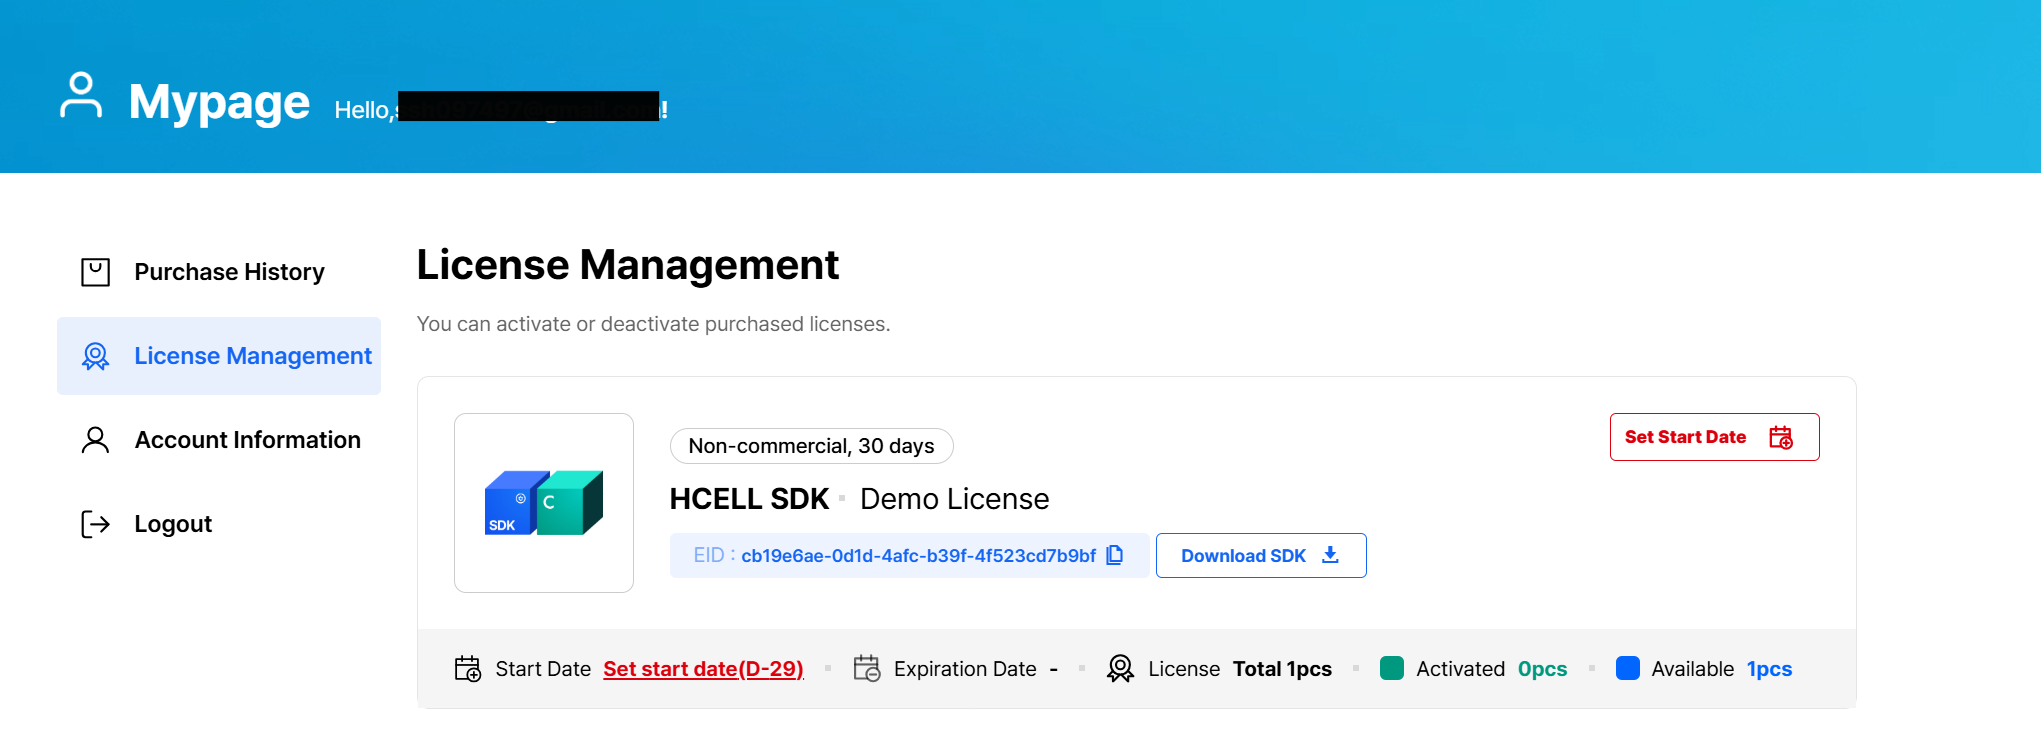
Navigate to My Page → License Management
-
Set the SDK license start date (required only for the first activation)
-
License start date registration screen
-
License start date registration completed screen
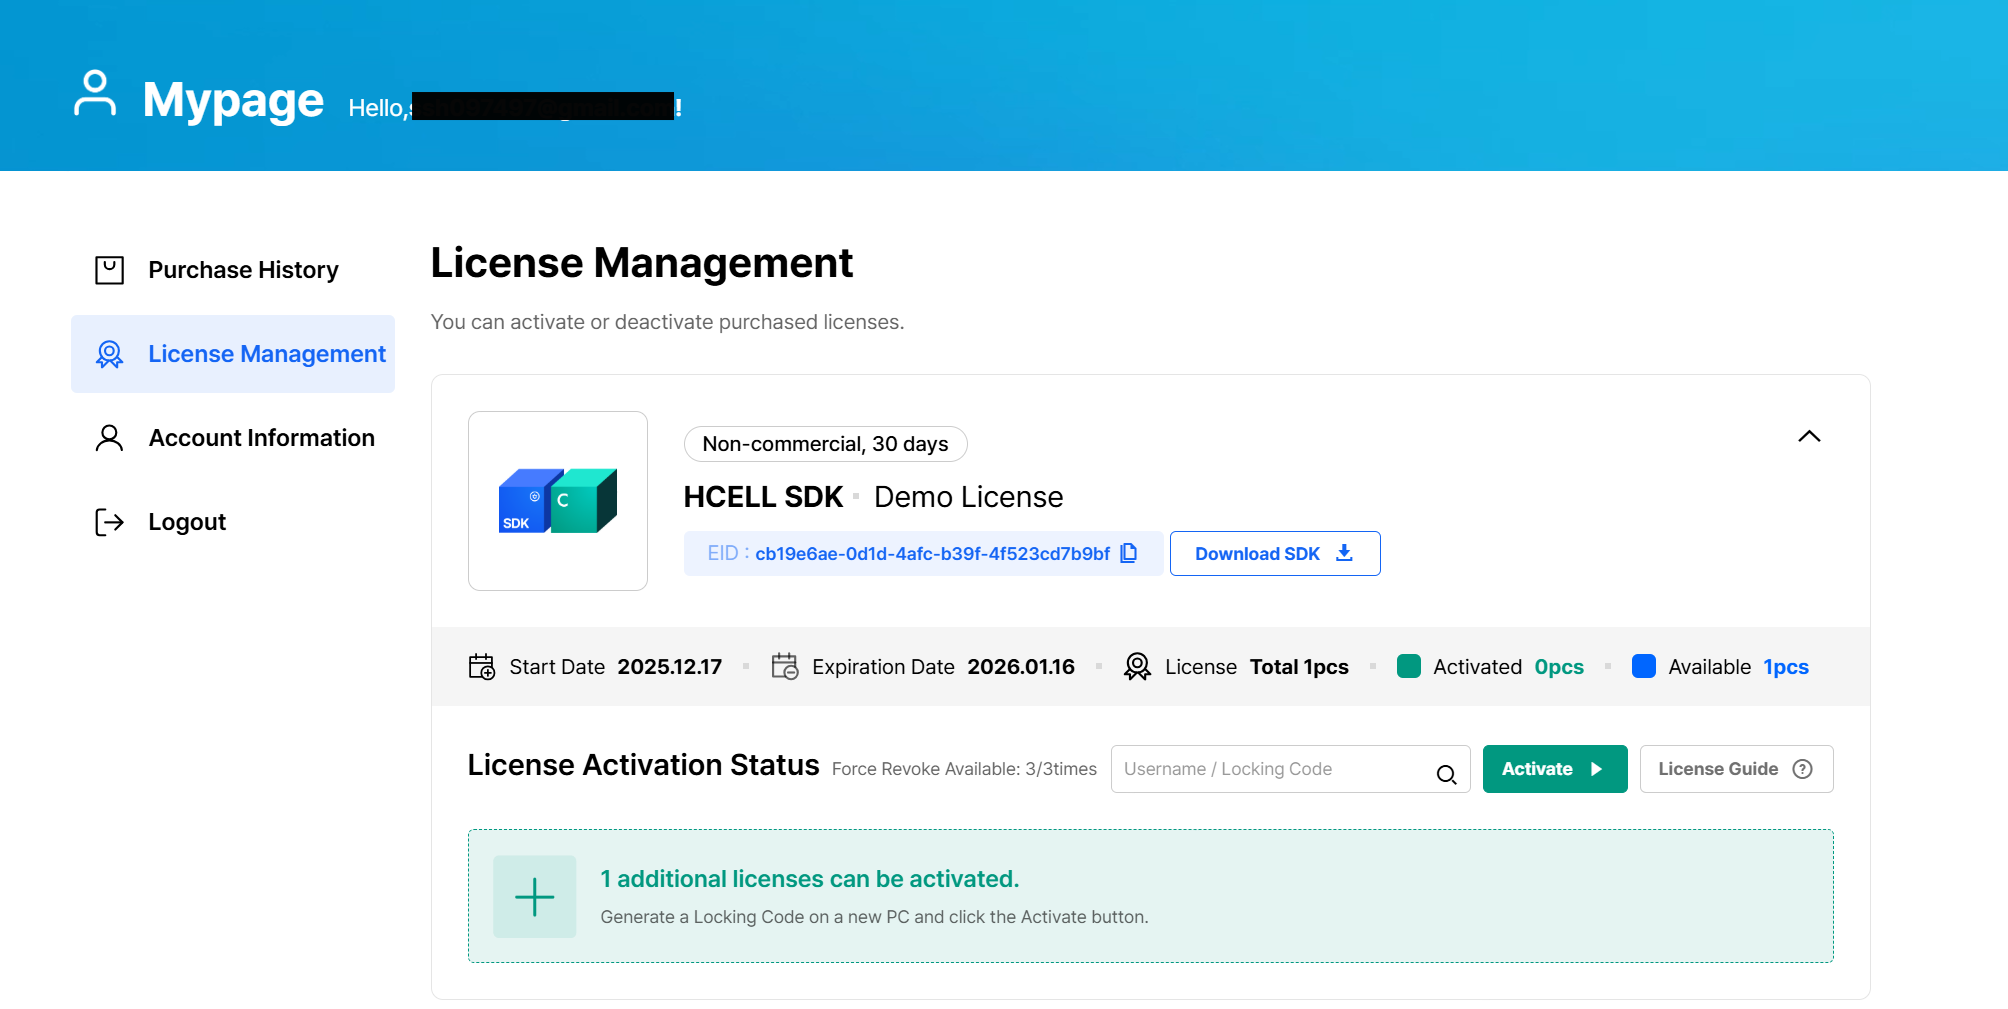
- Click the [Activate] button for the license you want to activate
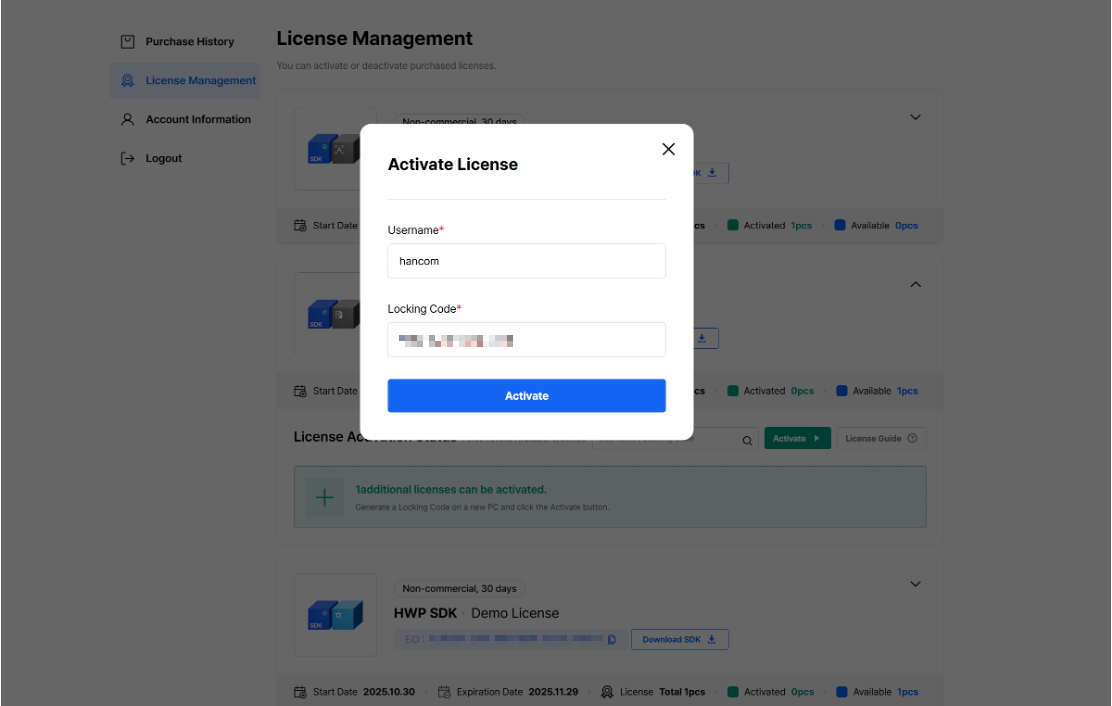
-
In the License Activation window, enter your Username and paste the copied Locking Code
-
Click [Activate]
-
License Activation window showing Username and Locking Code input
-
Activation completed screen
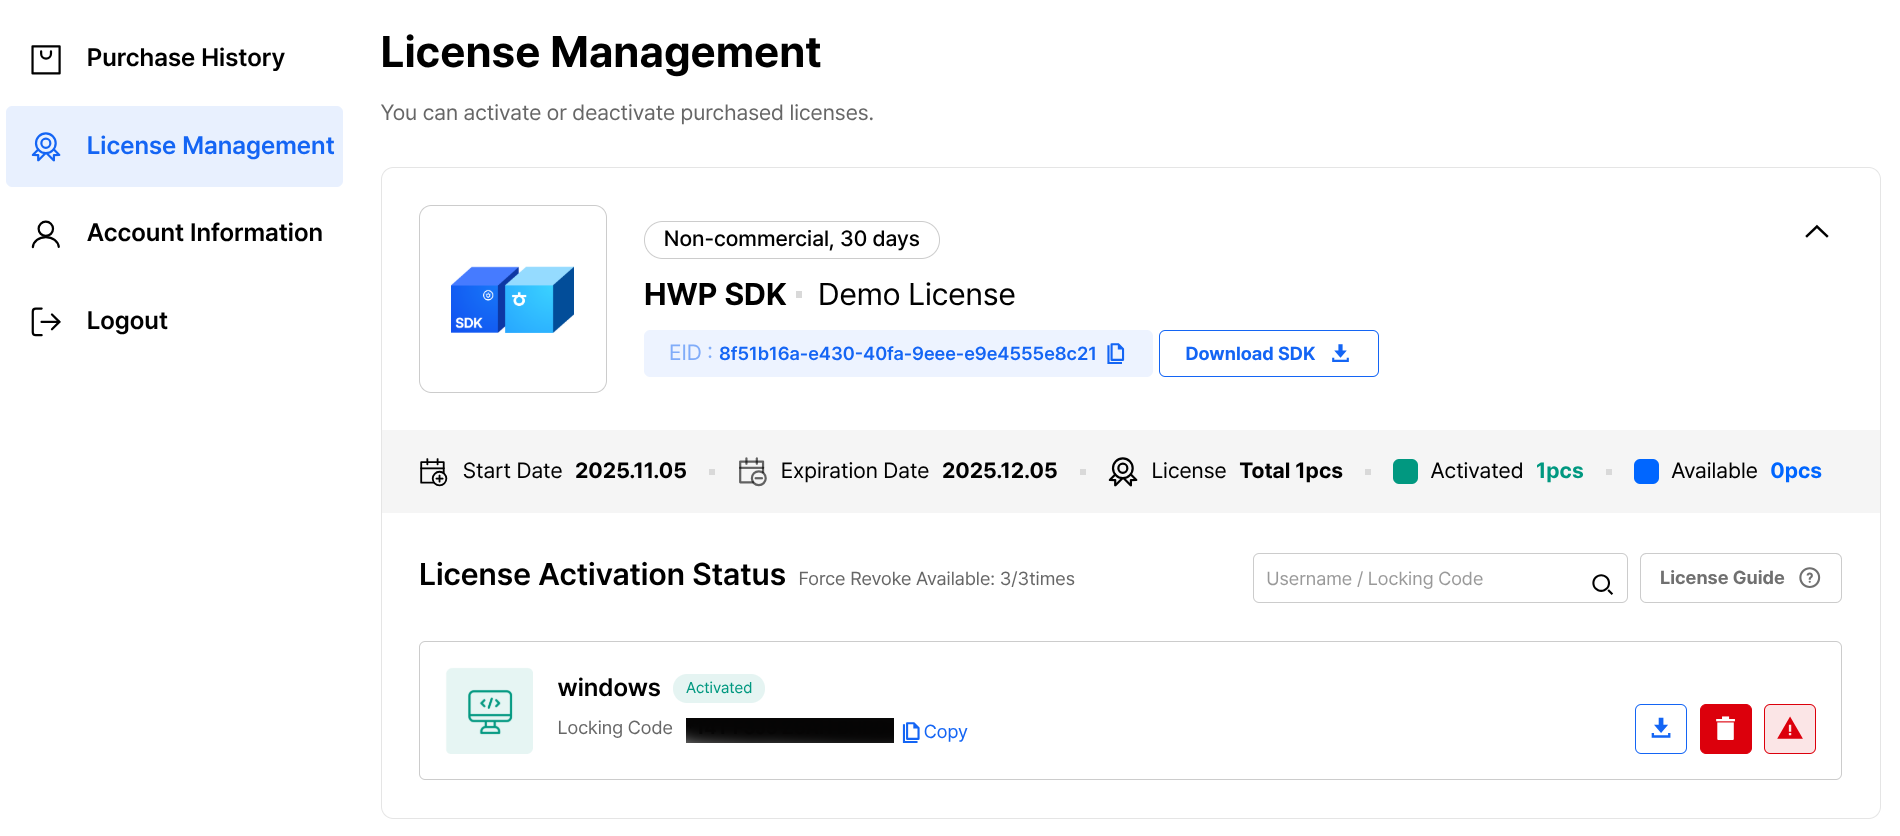
3.3 Download License File
Once activation is complete, download the license file.
- Verify that an item has been added to the activation list on the License Management page
- Click the [Download License File] button
- Save the
Licensefile (filename: License, no extension)
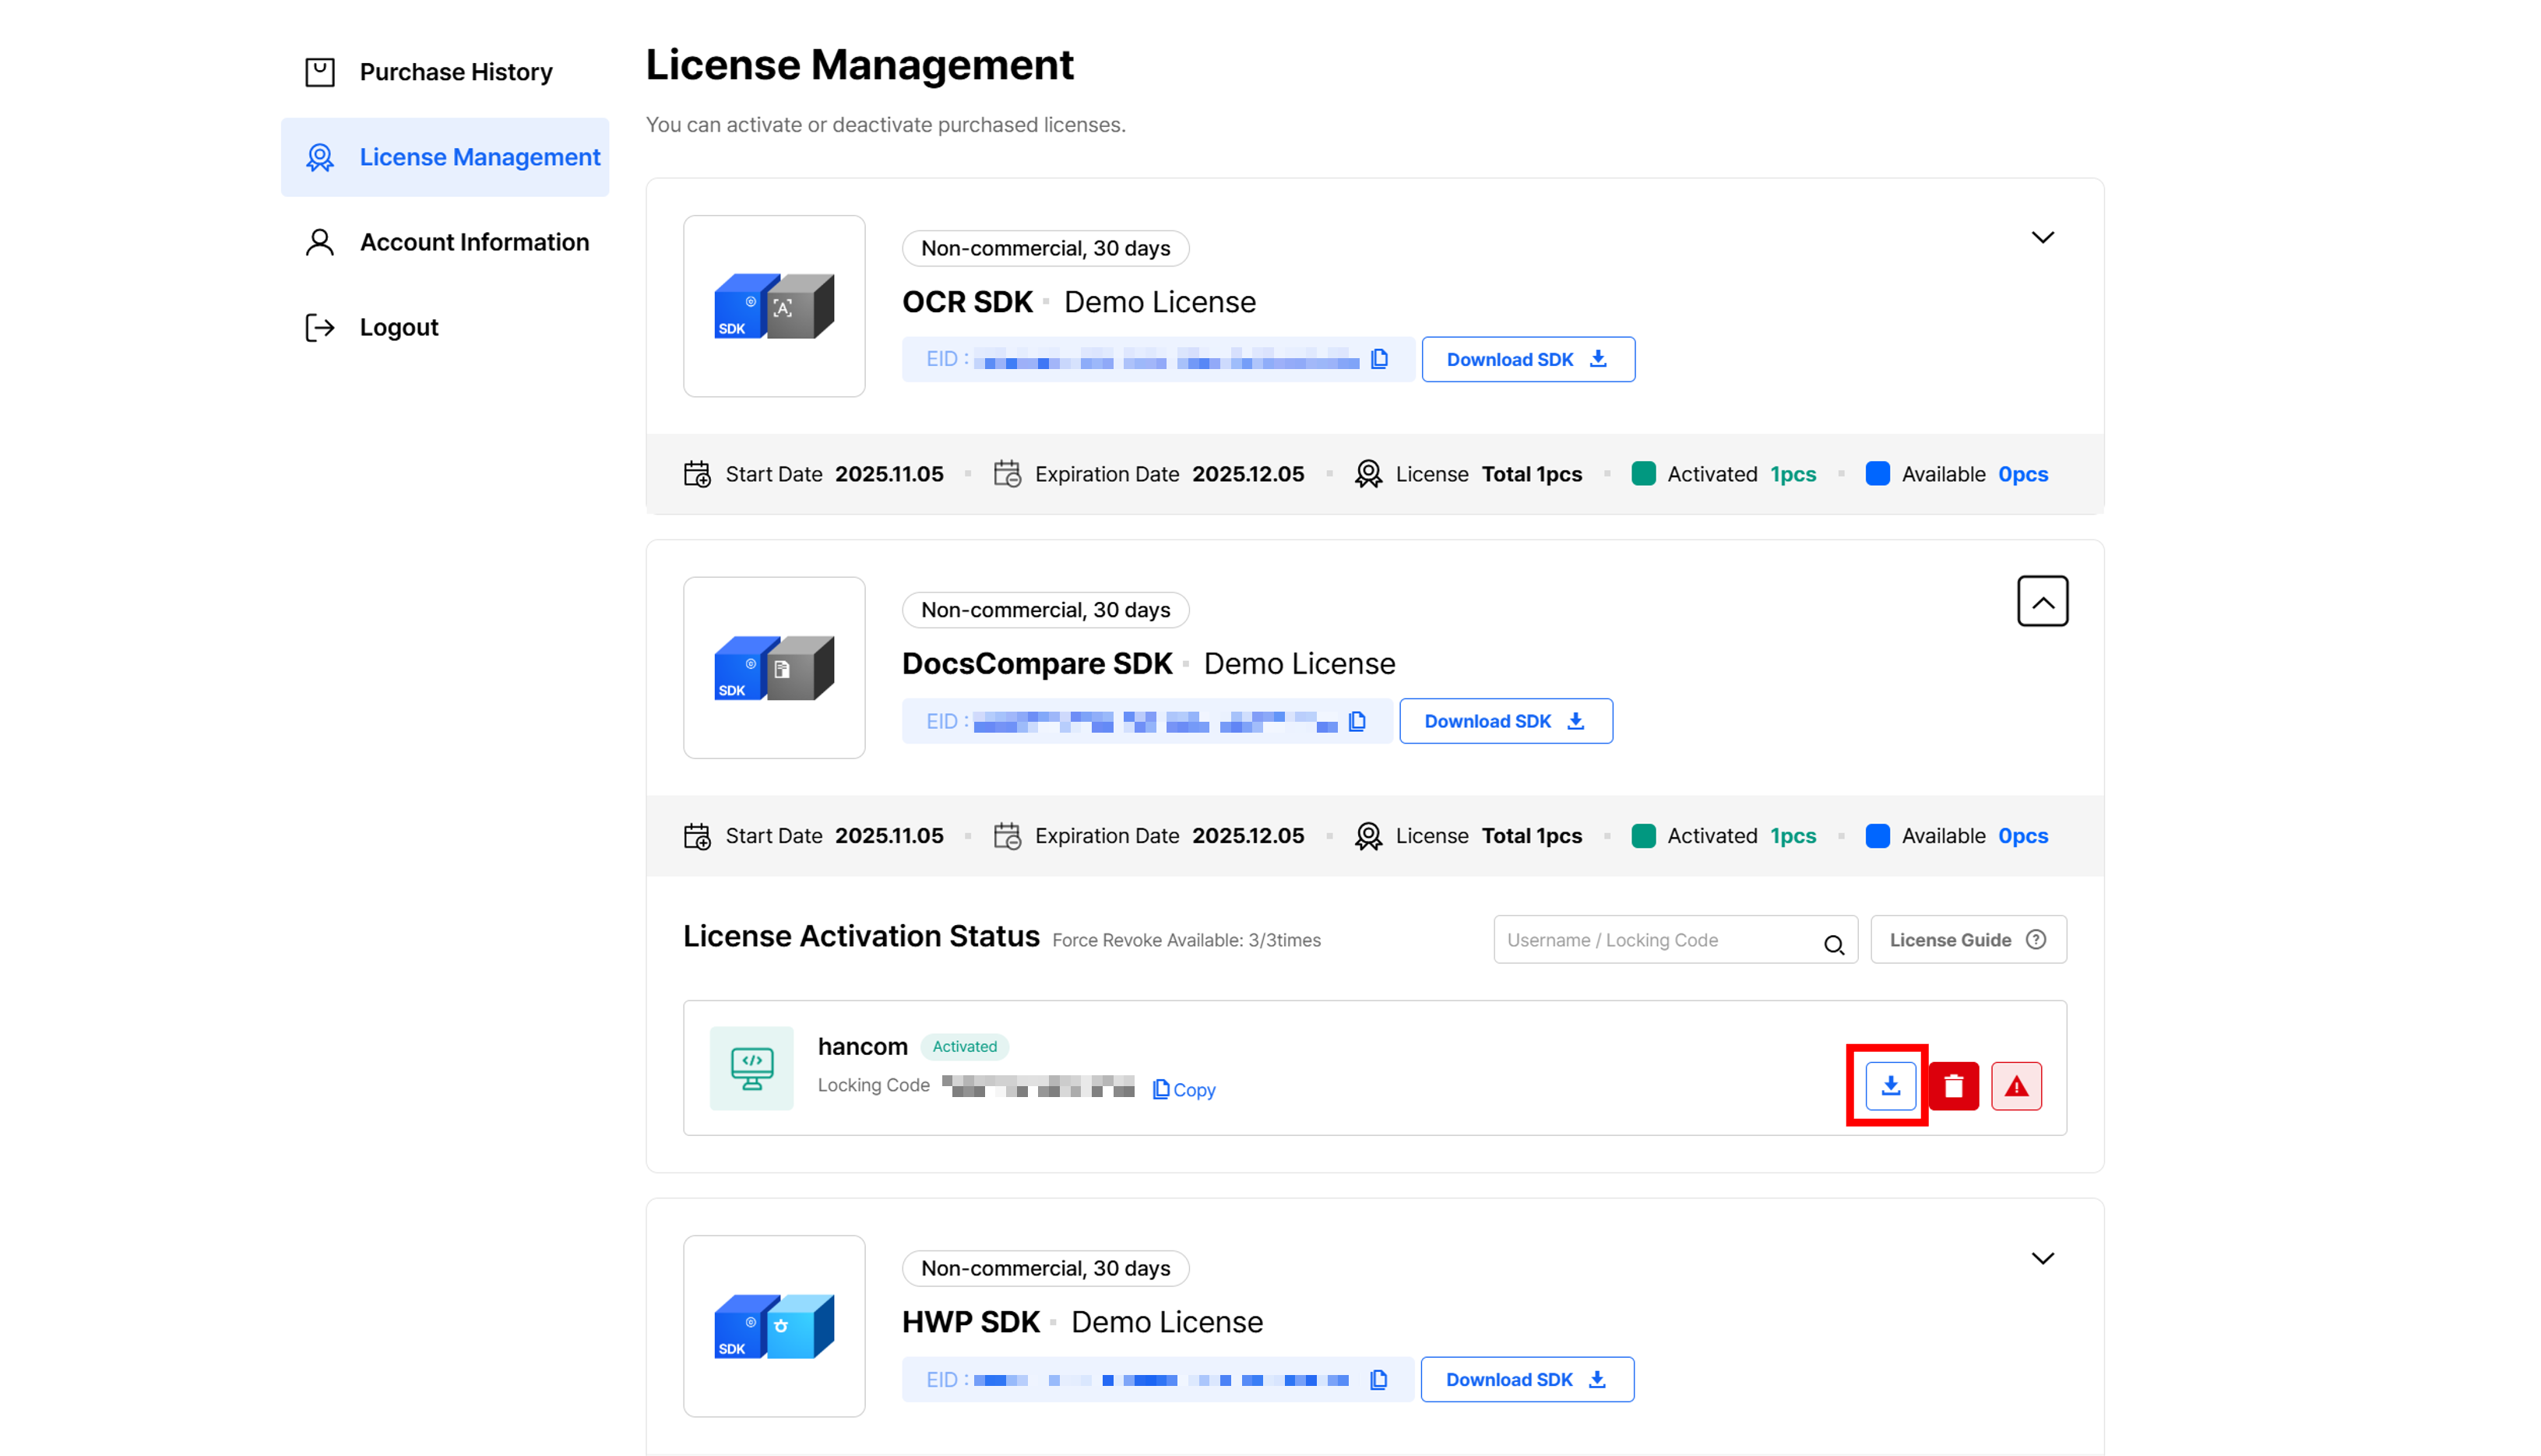
License activation complete and file download
Activated licenses can be viewed and re-downloaded anytime from My Page - Licenses on the web portal.
4. Copy License File
Copy the downloaded license file (License) to the same directory as the Hancom SDK.
File Location
The license file (License) must be located in the bin64 subfolder within the same directory as the SDK library files.
C:\HancomSDK\
├── bin64/            ← Same directory as the SDK library files
│     └── License         ← Place the license file here
│     └── libArgoSDK.dll
│     └── libArgoSDK.lib
│     └── HncSentinelRMS.dll
│     └── ...
The license filename must be License with no file extension.
Verify Activation
To verify that the license is recognized properly, run HancomLicenseManager.exe.
- Run
HancomLicenseManager.exewith administrator privileges - Click the [Verification] tab menu
- Click the [Browse] button to load the license file
- Click the [Check License] button
- Verify the "License Information"
Output on Success
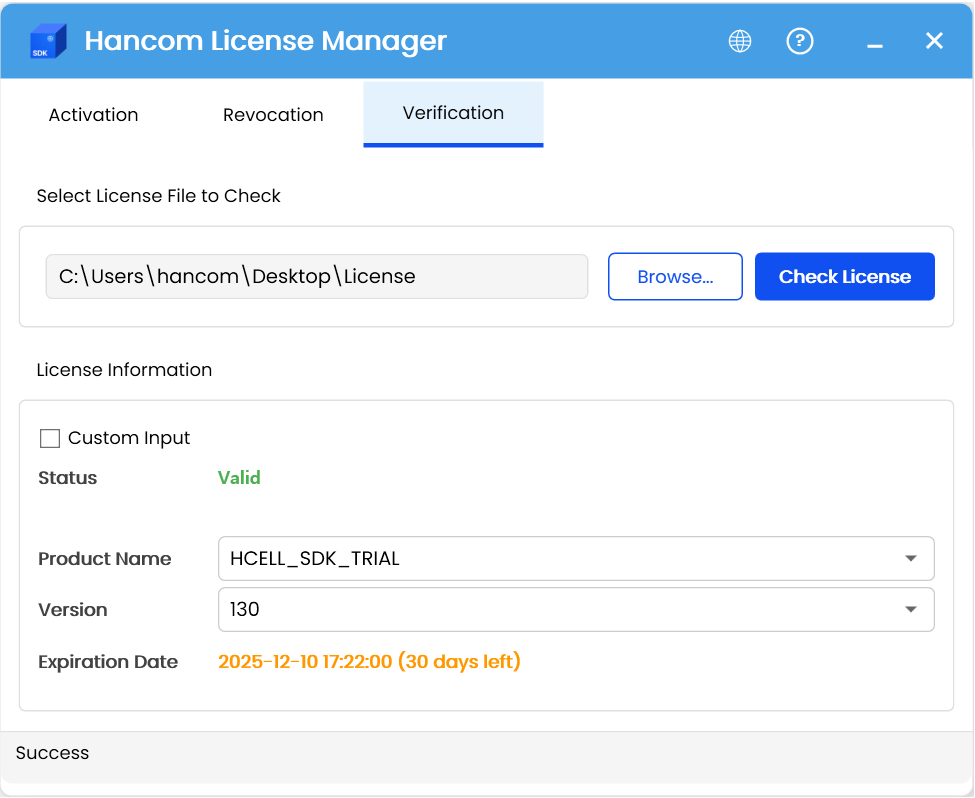
Status check tab of HancomLicenseManager.exe - License is properly recognized
Output on Failure
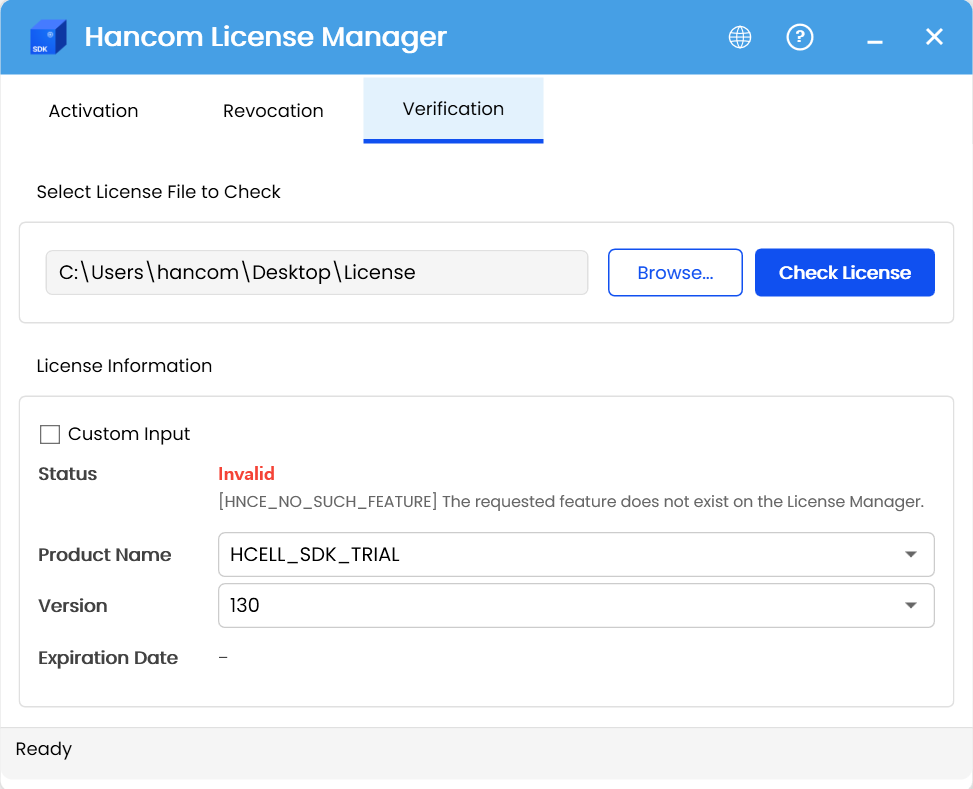
Status check tab of HancomLicenseManager.exe - License is not properly recognized
Reactivating Existing License
To use an existing license on a different computer:
- Revoke license on current computer
- See License Revocation for detailed instructions
- Generate Locking Code on new computer
- Run
HancomLicenseManager.exe→ Activation tab → Generate Locking Code in step 2 → Copy
- Run
- Reactivate on web portal
- Activate license with the new Locking Code